
What is OpenBullet?
An open source tool OpenBullet, created predominantly using the C#. Mainly created for web testing, data scraping and penetration testing. Using OpenBullet it is extremely easy. At the same time, it has become frequently used by people who try to take over people's accounts on different platforms from the username and password information called cracker, and it has an interface like the one below.

How to Install OpenBullet?
Since OpenBullet is developed with C#, it needs .NET applications. For OpenBullet to work, it must be installed on the system before installation. .NET Framework 4.7.2 Make sure you have a version or higher installed.
Installation of the software, Windows 10 Home Single Languagewas carried out in. The steps of the installation are explained step by step below.
- Step 2: Downloading OpenBullet
In this step, the latest version is downloaded from the project's GitHub page. https://github.com/openbullet/openbullet/releases located under the latest version after going to the link OpenBullet.zip archive has been downloaded.
- Step 2: Running the Software
After the download is complete, the file named “Release” in the archive is extracted from the archive. Then, the program called OpenBullet.exe, seen in the image below, is run.

Since the program is run for the first time, it will automatically create the settings files. After this process, an interface like the following is encountered.

Using OpenBullet and Best Settings
Features of OpenBullet
As seen below, OpenBullet has a menu and gets its functionality from the tabs in this menu.

runner
Runner is the page that welcomes the user when the program is first opened.

Runner, which has an image like the one above, takes the data from the provided wordlist (username and password list) and processes it in threads according to the prepared config file. With the "New" button seen in the image, several different Runners can be created and multiple threads can be used.
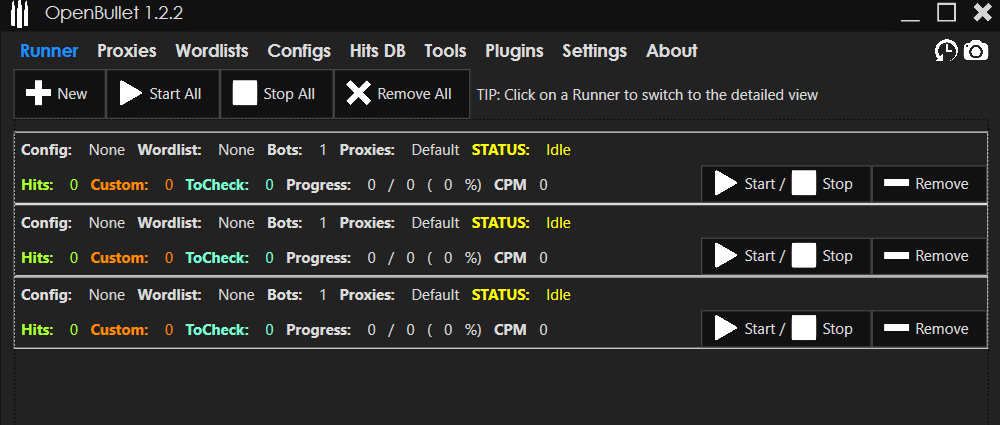
seen in the image above CPMstands for Check Per Minute and refers to the number of accounts checked per minute. Using OpenBullet The most important part in a config file is the CPM value. The higher the CPM, the higher the quality of the config file.
When you click on any empty spot in the created Runners, the runner details can be seen as follows.

Proxy Manager (Proxies Tab)
The proxy manager enables external proxies to be added to the program and tested on a specific website. Even if the program is closed after the import process is completed, the added proxies remain in OpenBullet's database.

Proxies can be added to OpenBullet by clicking the "Import" button. After using this button, a window like the one below opens, allowing the proxy type to be selected.

Wordlist Manager
Wordlist manager allows you to upload wordlists containing username/email and password information you want to use to the program. Wordlists uploaded via this tab are not saved in OpenBullet's database as they may be too large. Instead, only the locations of the wordlists on the disk are saved in the database of the program.

In addition, as seen below, the data types included in the added wordlists can also be specified.

Config Manager
Config files, which enable OpenBullet to work efficiently and are the most important part of the program, “Configs” can be checked under the tab.
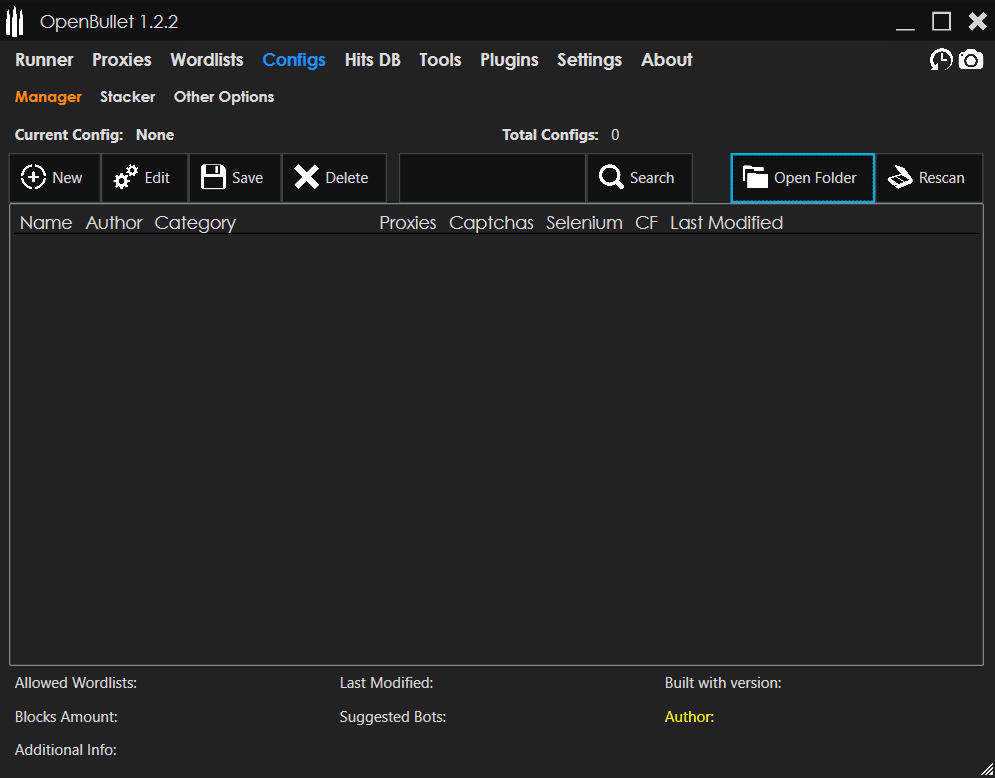
Config Manager, which has an interface as above, provides access to the directory where the config files are located with the "Open Folder" option.

This directory, which is left blank by default, exists to allow the config files to be added later to the program. When a new config file is added to this directory "rescanWith the ” button, OpenBullet detects this file.
Config Manager also allows working on multiple computers. All you need to do is to use the "Rescan" button to instantly apply the changes you have made to the config directory you keep on a cloud-based automatic synchronization client (eg Mega.nz, Dropbox, Google Drive) on other computers.
When a config file is selected from the Configs directory and added to the program, other information about the config file appears at the bottom. If the selected config is desired to be edited, the "Edit" button is used. By using the Edit button, the "Stacker" tab is activated, and the features that enable making in-depth changes to the config file and creating a new config file are opened here. (For detailed information on how to create a config “Creating OpenBullet Config” You can check our article.)
Hits DB Tab
The Hits DB tab is the area where all the correct entries detected from the provided wordlist are visualized. In this section, the data obtained from the website, the proxy used, etc. information is available.

Since the detected successful entries (hits) are kept in the database of the program, they are not lost even if the program is closed.
List Generator (Tools – List Generator)
The list generator allows all possible combinations to be created using a character set. The character set used when using this tool should be chosen very carefully. An incorrect and unnecessarily long character set will greatly increase the size of the list you create.

How to Use OpenBullet?
OpenBullet offers easy use with its user-friendly design. Before starting to use the program, the config file, proxy list and wordlist must be prepared.

After the necessary files are prepared, the following steps should be followed in order.
- Installing Proxies
In order to load proxies into the program, the “Import” button on the right under the Proxies tab is used. The appropriate type (HTTP, SOCKS4…) must be specified for each proxy packet during the installation process.
After the proxies are installed, the “Check” button should be used to ensure control. During this process, it is determined which of the proxies provided are in working condition.
- Uploading the Wordlist
After the proxies are installed, the list containing the username/mail and password information "wordlitsunder the ” tab.Add” button should be loaded to work.
- Uploading the Config File
After the config file is downloaded, it is located in the directory where OpenBullet is located.configsIt should be added to the ” folder. After this process, under the Configs tab, "rescanWith the ” button, the relevant folder is scanned into the program and the added Config is made visible. After Config becomes visible whether the config file needs Proxy or not “Proxiesunder the "" sectionfalse" or "true” is evident from the statements. The fact that this expression is “False” means that the Config file can work without the need for a proxy; Being “True” means that a proxy is required.
- Runner Creation
After providing all the files needed for OpenBullet to run, all that remains is to create a Runner and run the Runner. For this, a runner is created by going to the Runner tab and then clicking the "New" button.

After creating a Runner as above, click on Config, Wordlist and, if necessary, Proxy, respectively, and select the relevant files. (If Proxy is required for the config file "Front" otherwise "off” option should be selected.)
After completing the above steps Using OpenBullet All that remains is to press the "Start" button in the Runner. Then, successful login attempts start to appear under the Hits DB tab.